Repair & Protect Driveways, Roads and Parking Lots
Sealcoating is a critical part of asphalt pavement maintenance and one of the most effective ways to protect asphalt pavement from long-term damage. Asphalt pavement maintenance offers both protective and aesthetic benefits, helping your surface stay structurally sound while maintaining a clean, attractive appearance. A properly applied sealcoat strengthens the surface, slows deterioration and restores a rich, dark black finish that enhances your curb appeal. Whether you manage a commercial property, maintain public roads or care for your own driveway, sealcoating is a vital step in preserving asphalt pavement for years to come. In fact, your pavement is essentially the welcome mat to your property.
This guide outlines the essential SealMaster-approved steps for completing a successful sealcoat application, including cleaning, repairs, crack filling, priming, applying sealer and more. Following these practices helps ensure a durable, attractive and long-lasting result.

What You’ll Learn
- Why Sealcoating is Essential
- Understanding Sealer Types
- Step 1: Clean and Prepare the Surface
- Step 2: Fill Potholes
- Step 3: Fill Cracks
- Step 4: Oil Priming
- Step 5: Apply Sealer
- Step 6: Striping
- Weather & Drying Times
- Learn More about Sealcoating & Pavement Maintenance
- SealMaster’s Expertise and Support

Why is Sealcoating Essential?
Sealcoating is one of the most effective ways to preserve asphalt pavement and protect your investment. Asphalt pavements naturally degrade over time, but routine sealcoating helps slow the process and prevents many major issues from forming in the first place. By adding a protective layer over the surface, sealcoating minimizes wear, delays costly repairs and extends the overall lifespan of driveways, roads and parking lots. For property managers, business owners and homeowners alike, this routine maintenance step can save thousands of dollars by reducing the need for premature resurfacing or reconstruction.
Asphalt pavement may be durable, but it is highly vulnerable to the elements. Over time, sunlight, water, chemicals and traffic wear down asphalt binder—the glue that holds asphalt pavement together. UV exposure oxidizes the surface, causing it to fade to gray, dry out and become brittle. Water intrusion leads to cracking, raveling and eventually potholes. Oil and fuel soften the asphalt surface, and dirt and debris grind into the pavement under everyday vehicle traffic. Sealcoating forms a protective barrier that defends against these elements, extends pavement life and reduces long-term repair costs.
A properly applied sealcoat creates a durable, flexible barrier that:
- Shields against UV exposure and oxidation
- Reduces water penetration into cracks and pores
- Protects against oil, fuel and chemical drips
- Improves traction
- Restores the pavement’s rich black color
- Extends the life of asphalt surfaces
Regular sealcoat applications, typically every three years, can double the lifespan of asphalt pavement. A sealed surface is also easier to clean and maintain, offering long-term functional and aesthetic improvements for both residential and commercial properties.

Understanding Sealer Types
Different regions of the United States have historically preferred different sealer formulas, each offering its own performance benefits.
Asphalt-Based Sealer
Asphalt-based sealers are the most widely used today due to their flexibility, fast drying times, deep black finish and overall user-friendliness. They are well suited for driveways, roads and parking lots and are the preferred choice for many SealMaster customers.


Coal-Tar Sealer
Coal-tar sealers were traditionally more common in the Midwest and Eastern United States. They are highly resistant to fuel and chemical spills but have a stronger odor and more aggressive handling characteristics. The strong scent is also known to cause headaches for some users. Due to this, more contractors and property owners are choosing asphalt sealer instead, which offers a more comfortable application experience and is becoming the preferred option in the industry.
Liquid Petroleum Pitch Based Sealer
Liquid petroleum pitch based sealers offer performance similar to coal tar with less odor.
SealMaster manufactures asphalt-based, coal-tar and liquid petroleum pitch based sealers to provide material options that align with your performance needs, local regulations and project requirements.
Step 1: Clean and Prepare the Surface
Proper cleaning and preparation create the foundation for a successful sealcoat application. Asphalt pavement must be clean, dry and free of debris. Skipping or rushing this step can prevent the sealer from bonding and may lead to early failure.
Remove Vegetation and Debris
The first step is clearing the pavement surface of grass, weeds, dirt and loose material. Contractors commonly use tools such as:
- Lawn edger to remove grass and weeds along pavement edges
- Push or rotary brooms to break up and remove heavy dirt deposits
- Power blowers to clear remaining dust and loose debris
- Crack Cleaner tools to quickly remove dirt from surface cracks
- Sweeper trucks for large commercial parking lots
- Pressure washing in extreme cases where additional cleaning is required
Thorough cleaning ensures the pavement is free of contaminants that interfere with sealer adhesion.

Step 2: Fill Potholes
Once the pavement is clean, repair any potholes so the sealcoat has a smooth, stable surface to adhere to. Potholes form when water gets into cracks, weakens the base and breaks the pavement apart and if they’re not repaired, they continue to grow and allow more water intrusion.
Why Pothole Repair Matters:
- Prevents further pavement damage
- Improves safety for drivers, cyclists and pedestrians
- Helps your sealcoat bond and wear evenly
Many professionals rely on PatchMaster High Performance Pothole Patch. It’s been a trusted solution for more than 35 years because it’s durable, easy to use and works in all weather conditions.
Simple Application:
- Pour PatchMaster directly from the bag into the pothole
- Slightly overfill to allow for compaction
- Compact with a heavy-duty hand tamper or plate compactor
- The patch is typically ready for traffic immediately
PatchMaster creates a solid, even base that sets you up for a smooth, long-lasting sealcoat.

Step 3: Fill Cracks and Repair Alligatored Areas
Crack filling is an essential component of any sealcoating project. Untreated cracks allow water to penetrate the pavement and damage the base, leading to potholes, heaving and extensive structural failure. Proper crack cleaning and filling help maintain pavement integrity.

 Clean Cracks Thoroughly
 Clean Cracks Thoroughly
Before filling, cracks must be cleaned to ensure proper adhesion. Common crack-cleaning tools include:
Removing dirt, vegetation and debris allows the crack filler to bond effectively.
Hot-Pour Crack Fillers
Hot-pour crack fillers come in block form and are melted in specialized equipment, such as:
- Pour pots
- Crack banders
- MA-10 machines
- CrackPro melter/applicators
These materials provide long-lasting, professional-grade results.
Cold-Pour Crack Fillers
Cold-pour crack fillers are well suited for parking lots, residential or small-scale repairs and can be applied with:
- Pour pots
- Crack banders
- Pump systems
- Squeeze jugs
These materials offer a convenient and effective solution for quick repairs.

Repairing Alligatored or Severely Damaged Areas
Surface cracking clusters, also known as “alligator cracking” cannot be sealed over and cannot be treated with standard crack filler. These areas require surface repair before the sealcoat is applied.
The primary repair method is:
- GatorPave: A ready-to-use, polymer-modified repair solution ideal for restoring alligatored pavement
For extreme cases involving structural failure, full-depth asphalt replacement may be required, which involves cutting out the damaged pavement and replacing it with new hot-mix asphalt.
Proper repair ensures the sealcoat bonds evenly and performs as intended.

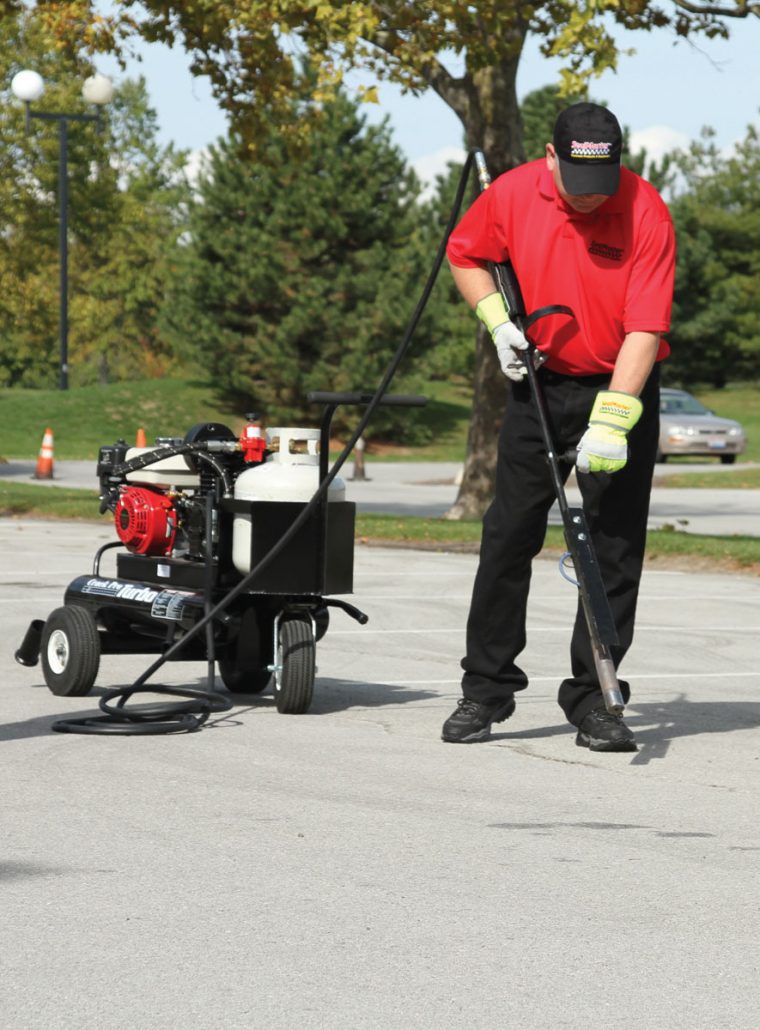
Step 4: Prime Oil Spots
Oil spots must be thoroughly cleaned and primed before sealcoating to prevent residual oil from bleeding through the newly applied sealer.
Cleaning Methods
Depending on the severity, cleaning oil spots may involve:
- Scraping with an oil-spot brush
- Rotary brooming
- Torch-treating stubborn areas
- Detergent and water scrubbing
Priming
After cleaning, apply an oil-spot primer such as PetroSeal or PrepSeal by brush or spray and allow it to dry completely.

Step 5: Apply Sealer
Before applying sealer, always review the SealMaster Technical Data Sheets (TDS) and Safety Data Sheets (SDS). These documents provide correct mix design, coverage rates and application instructions. Following these guidelines is crucial for proper performance.
Choosing an Application Method
SealMaster asphalt pavement sealers can be applied by spray, squeegee or a combination of both.
Spray Application
Spraying provides:
- A consistent, uniform film
- Excellent coverage across pavement aggregate
- Greater control on large projects
For best results, each spray should overlap 50% into the previous pass to prevent streaking and ensure even coverage.

Squeegee Application
Squeegee application:
- Pushes sealer into asphalt pores
- Works well on older or more porous surfaces
- Creates strong first-coat penetration
Each squeegee pass should overlap 6 to 12 inches into the previous pass to maintain consistent coverage.

Combination Method
Many contractors use both methods:
- First coat: Squeegee to fill surface pores
- Second coat: Spray to an even, controlled finish
This method enhances both durability and appearance, providing a smooth surface with deep protection.
Application Tips
To achieve a professional quality sealcoat application, keep the following best practices in mind
- Start with trim work by cutting in the edges first to prevent sealer from getting on curbs, sidewalks and adjoining surfaces.
- Apply sealer uniformly and maintain a wet edge throughout the process to avoid streaks or uneven coverage.
- Apply a minimum of two coats across the entire pavement surface for adequate protection.
- Use a third coat in high-traffic areas such as entrances, exits, and drive lanes to enhance durability.
- Use SealMaster-approved spray units and squeegee machines, which are designed to maintain consistent agitation and deliver sealer evenly during application.
- Hand squeegees and brushes can also be used for applying sealer, especially for smaller areas or spots that require more detail.
Step 6: Striping
Once the final coat of sealer has cured, you’re ready to stripe your asphalt pavement. SealMaster offers traffic paints designed for fast, clean application with standard airless striping machines.
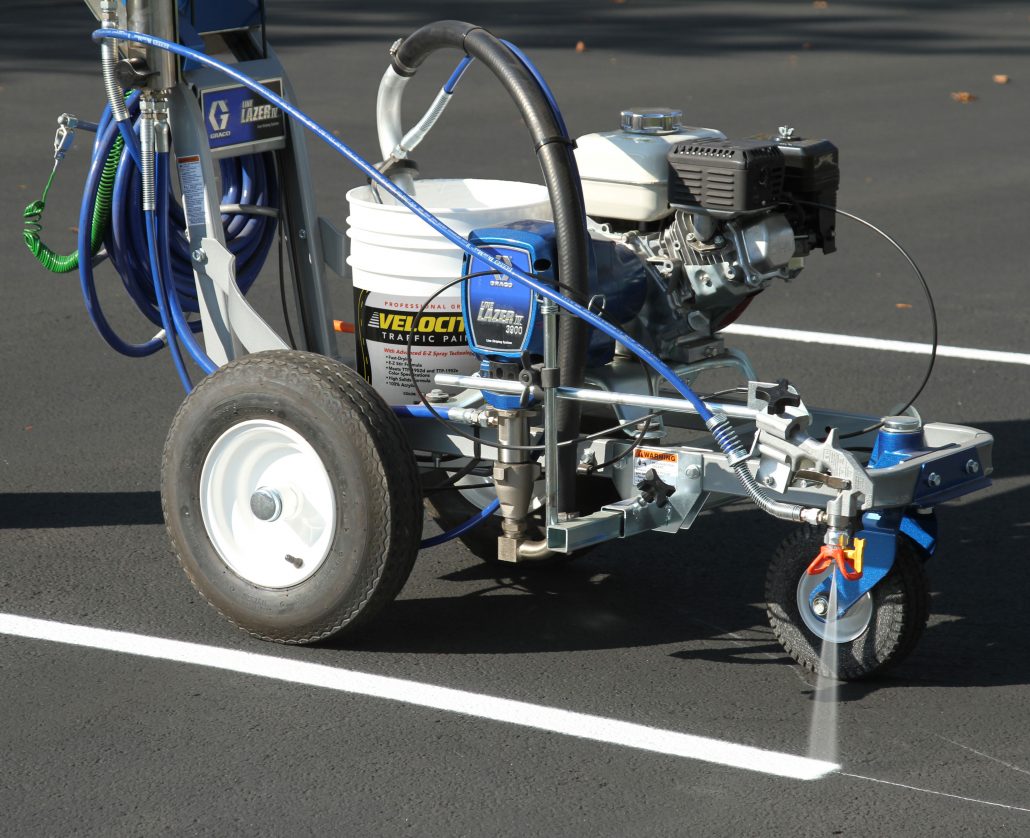
Traffic Paint Options
- Velocity Traffic Paint
- Fast-drying formula
- Meets Federal Specs TTP-1952D and TTP-1952E color requirements
- Advanced E-Z Spray technology for crisp, consistent lines
- High-solids, durable, 100 percent acrylic formula
- EZ-stir blend with minimal settling during storage
- Available colors: White, yellow, handicap blue
- Liquid Thermoplastic Traffic Paint
- High-performance, cold-applied marking paint
- Wears three to five times longer than standard traffic paint
- Applies easily with standard airless striping equipment
- Available colors: White, yellow, blue, red, black
Layout and Marking Tools
Weather Conditions and Drying Time
Sealcoating is a warm-weather process and should only be performed under appropriate environmental conditions.
Do Not Apply Sealer If:
- Temperatures will drop below 50°F within 24 hours
- Rain is forecast within 24 hours
Cold temperatures can cause the sealer film to dry improperly and become brittle or flaky. Rain can wash away uncured sealer entirely.
Drying and Curing Guidelines
- Allow each coat to dry thoroughly before applying the next
- Keep all foot and vehicle traffic off the surface for at least 24 hours
- Perform striping only after the final coat has fully cured
Learn More about Sealcoating & Pavement Maintenance
If you’re looking to take the next step in understanding asphalt protection, explore the fundamentals behind why sealcoating works and how it helps extend pavement life. Our companion article, What Is Asphalt Sealcoating? breaks down how asphalt pavement is built, why it deteriorates and the science behind how sealcoating preserves driveways, parking lots and roadways.
Read the full guide: What Is Asphalt Sealcoating?
SealMaster Expertise and Support
Successful sealcoating depends on proper surface preparation, quality materials and following SealMaster’s recommended best practices. With more than 60 years of industry experience and over 3 billion gallons of pavement sealer applied worldwide, SealMaster is recognized as the No. 1 brand of pavement sealer.
As a one-stop source for pavement maintenance solutions, SealMaster offers premium products, equipment and training through a franchise network of 125+ manufacturing and distribution centers across North America—along with product distribution in more than 60 nations. This extensive reach ensures contractors, municipalities and property owners get the support they need to maintain and extend the life of their pavement.
SealMaster’s national network of professional contractors provides full-service pavement maintenance solutions, including pothole repair, crack filling, sealcoating and line striping. For expert guidance, product recommendations or to connect with a pavement maintenance specialist, contact your local SealMaster for a free inspection or project estimate.